16:45 - EFSANE GÖZ DOKTORU KADİR EKERCAN: AMASYA TABİPLER ODASI BAŞKANI SEÇİLDİ
16:39 - Amasya’nın Tek Kadın Kaymakamı Şeyma Şendur, Hamamözü’nde Görevini Tamamladı
16:34 - Amasya Arkeoloji Müzesi’nde Sıra Dışı Keşif: Müslüman Mumyaları Sergileniyor!
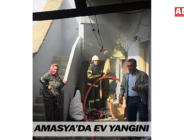
16:30 - Taşova’da Yıldırım Düşen Evde Yangın Çıktı: İtfaiye Müdahale Etti
16:22 - CHP Amasya Merkez İlçe Başkanlığı, Danışma Kurulu Toplantısı Düzenledi
16:17 - Amasya Ormanlarında Tıbbi ve Aromatik Bitki Üretimi Projesi Hayata Geçirildi
16:10 - AK Parti Merzifon’da Muhtarlarla İstişare Toplantısı Düzenledi
16:06 - Amasya’da Gazinoya Yapılan Operasyonda 6 Ruhsatsız Silah Ele Geçirildi
16:03 - Amasya’da Doktor ve Hastanın Arasında Kapı Çalma Olayı: Arbede Yaşandı
Adobe Photoshop – Wikipedia.Cropping Images In Photoshop CS6

Vectornator is – like Illustrator – a vector-based tool.
Photoshop CS6 gives us a couple of different ways to straighten an image using the Crop Tool. Both have their pros and cons as detailed here. How to Crop an Image in Adobe Illustrator in 3 ways. The crop box and handles will re-appear around the image. As with previous versions of Photoshop, to crop an image, we start by selecting the Crop Tool , either by clicking on its icon in the Tools panel along the left of the screen or by pressing the letter C on the keyboard. Cropping a raster image is not the same process as cropping a vector shape.
See the following sections about the differences between linked and embedded images. Both of these panels are context sensitive. Therefore, their contents change dependant on what type of object s is selected. This screenshot was taken with only a single placed image selected. The Properties Panel has also evolved with subsequent iterations of the Creative Cloud; therefore, depending on the version of the Illustrator CC you are running, you may see differences. With the single placed or embedded image still selected, click on the Mask button in the Control or Properties panel.
Drag any of the mid-edge or corner handles that are placed around the image to change the size of the vector mask. Continue to edit the handles until you’re happy with the result. As soon as you start to do another operation in Illustrator, all automatic vector mask editing is fixed. To target select the clipping path, click on the “meatball” icon as highlighted here below.
With the single placed or embedded image still selected, click on the Crop Image button in the Control or Properties Panel. Note: if the image was linked rather than embedded, the warning dialogue will be presented stating “Cropping a linked file embeds a copy of the original.
The original file at the linked location is not affected. This is a welcome feature to automatically perform this logical operation. Unlike with the Mask button, a much clearer change of annotation surrounding the image is presented.
The Control and Properties Panels both also temporarily change whilst the crop is taking place. Click-and-drag any of the mid-edge or corner image handles. Holding down Alt will also ensure that any changes are mirrored on the opposite side or corner.
Numerical controls are also presented in the Control and Properties Panels to precisely state the image dimensions. It’s also possible to simultaneously re-sample the image to a different resolution from current using the PPI value presented in the Properties Panel. When happy with the crop, click on the Apply button in the Control and Properties Panels.
The resultant image now has the excess image data removed. Note that unless you Undo the operation now, without resorting to re-placing the image in the document, there’s no way to revert back to the original un-cropped image. Several years before Adobe got around to adding true image cropping to Adobe Illustrator, Astute Graphics introduced the Rasterino plugin.
This product, now part of our subscription , features the Crop Image Tool. Next, click-and-hold the Eraser Tool icon in the toolbox highlighted red below and release the mouse when hovering over the Crop Image Tool.
It is important an embedded image is selected. If the image is linked, first embed it using the appropriate button found in the Control or Properties Panels. A frame annotation will appear around the embedded image with control handles as well as a floating information annotation with a “tick” and “cross” icon to either apply the desired crop or cancel. The floating annotation also provides before and after pixel dimensions. Alternatively, use the Enter Return key to quickly apply a crop.
Whereas the native and Rasterino image cropping methods detailed to this point are adequate for quick visual tasks, it’s sometimes necessary to make a more precise change or control multiple images simultaneously.
The example image used throughout the article was edited in Photoshop so that a radial gradient transparency was introduced. When the image was embedded in Illustrator, the extremities of the image were redundant due to a lack of opacity. The common situation of having a transparent image embedded in Illustrator with excessive transparency masking is an ideal situation for using the Trim Image function via the Rasterino Panel.
With the semi-transparent image selected in Illustrator, the Trim Image icon in the Rasterino Panel was selected highlighted in red to open the Trim Image dialog. The defaults of Transparent Pixels and Preview remained selected highlighted in green. Automatically, the image boundary annotation shows the suggested image crop that will take place illustrated with the yellow arrows.
Click on OK to trim the image and crop away the excess transparency pixels, or Copy to maintain the underlying image and place a trimmed copy exactly in position on top. All visual guesswork to achieve this has been eliminated.
This Rasterino function also allows for the trimming of excess flat color areas based on the top left or bottom right pixels. If you need to be very precise about the final image size, it’s highly recommended you use the Crop Image dialogue accessed via the Rasterino Panel. With one or more embedded images selected, even if different sizes, click on the Crop Image icon to open the dialogue.
From here, you can numerically adjust the image size with annotated previews on the artboard of the result. Critically, you can crop by stating how much you want to reduce the image by, instead of absolute.
Plus, easy access to the units of measurement used to determine the crop are presented. As with the Trim Image function, OK will fix the crop whilst Copy will maintain the underlying image s and place the resultant cropped image instances on top in position. That’s why we recommend using masks in all of your cropping ventures. The best aspect of a clipping mask is that your images can be cropped into any custom shapes you want.
A clipping mask can take any shape or form. First, you must create the shape you want to use as a cropping shape. This is also known as a clipping path. If you already have the shape, add it to your canvas on top of the object you want to crop. Now you can see your cropped image. First, draw the shape you want to crop your image or import a preexisting shape into your canvas and color it black or white.
With opacity masks, white means that the image will be opaque in that area. Black signifies that the part of the image will be completely transparent. Grays indicate a fade from opaque to transparent or a gradient. Select both the image and the shape. A new panel will appear. Then click Make Mask , but ensure the Clip checkbox is activated. You can also use the quick and dirty Illustrator Artboard alternative to crop an image in Illustrator.
This will only work with rectangular crops, of course. Your graphic is still pretty much whole on the page, just outside the edges of the Artboard. The method is straightforward. Click on the Artboard icon and change its shape to the area you want to crop. Then export the file! Still, you want to keep the aspect ratio the same as the original image, a prevalent task in graphic design, especially for digital marketing purposes. The process is much simpler than it might sound initially. Create a shape that covers the entire size of your image by using the Rectangle Tool.
This will guarantee that the aspect ratio is maintained. Vectornator is – like Illustrator – a vector-based tool. It takes only a few steps and is super easy to perform, even for inexperienced users. The Clipping Mask function in Vectornator gives you unlimited options to crop your image. We will give you the freedom to crop your image into any shape or form you want with VectoRegarding. Regarding navigation and UI, Vectornator and Illustrator look very different.
Even as a mid-level user, you still might find yourself googling for answers on how to use the software when your mind should be focused on designing instead. Something needs to change when a design tool needs so many steps, shortcuts, and hidden functions to be functional at a basic level. Vectornator possesses a straightforward and intuitive interface.
No hidden menus or unnecessary clutter. Even a beginner will be able to navigate the interface very quickly. The app has a very flat learning curve. Our goal while designing the app was to make it easily accessible for beginners but with the ability to perform professionally. You can crop a raster-based image in Vectornator by using the Mask function. There are several benefits when using this technique:. In Vectornator, any shape that is a closed path can be turned into a clipping mask.
The possibilities to create a shape for a clipping mask are unlimited in Vectornator. Let us explain to you in a few simple steps how you can crop a raster-based image in Vectornator by using the Masking Technique:. Select the Shape Tool in the Toolbar. Set the number of polygon sides to five with the Tool Slider.
Click and drag on the canvas to create the shape. Use the Selection Tool to move, scale, and rotate the Polygon Shape. Select the vector masking shape and move it to the bottom of the layer stack in the Layers Tab, below the imported raster image. Position the masking vector shape on the canvas.
The imported raster image is now only visible within the boundaries of the masking shape. The masking layer now displays a tiny mask symbol, and the masked layer is linked to the masking layer with a dependent arrow. Now that we have established the clipping mask structure, you can still edit the mask by selecting and moving the masking shape around or by editing the masking shape with the Node Tool, as the clipping mask feature in Vectornator is a non-destructive operation.
The barrier to producing your own comic is lower than ever. But how do you monetize it? We show you how to turn your artistic talent into revenue. Has stress taken its toll on your creative work and mental health? Learn what signs to look out for and how to overcome creative burnout.
Do you love seeing custom Instagram Highlight Covers but struggle to get it right on your profile? Learn our fail-proof tips. If you want relevant updates occasionally, sign up for the private newsletter.


 Almanya’da “Yurtta Sulh Cihanda Sulh” Pankartları açıldı mı ?
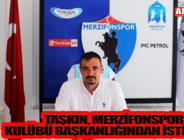
 Mart ayı olağan Meclis Toplantımızı gerçekleştirdik. Merzifon Belediye Başkanı Alp KARGI, Belediye Meclis Üyelerimize görev süresi içerisinde birlik beraberliğimize sundukları katkı ve özverili çalışmaları ve Merzifon da olan hizmetleri için teşekkür edip, plaket takdiminde bulundu.
 EFSANE GÖZ DOKTORU KADİR EKERCAN: AMASYA TABİPLER ODASI BAŞKANI SEÇİLDİ
 Amasya’nın Tek Kadın Kaymakamı Şeyma Şendur, Hamamözü’nde Görevini Tamamladı
 Amasya Arkeoloji Müzesi’nde Sıra Dışı Keşif: Müslüman Mumyaları Sergileniyor!
 Taşova’da Yıldırım Düşen Evde Yangın Çıktı: İtfaiye Müdahale Etti
 CHP Amasya Merkez İlçe Başkanlığı, Danışma Kurulu Toplantısı Düzenledi
 Amasya Ormanlarında Tıbbi ve Aromatik Bitki Üretimi Projesi Hayata Geçirildi
 AK Parti Merzifon’da Muhtarlarla İstişare Toplantısı Düzenledi
 Amasya’da Gazinoya Yapılan Operasyonda 6 Ruhsatsız Silah Ele Geçirildi
 Amasya’da Doktor ve Hastanın Arasında Kapı Çalma Olayı: Arbede Yaşandı
 1 Mayıs İşçi Bayramı’nın gerekçesiyle Amasya Anıt Meydanı’nda düzenlenen etkinlikler kapsamında anlamlı bir çelenek sunumu gerçekleştirildi. Bu özel gün, işçi sınıfının tarih boyunca verdiği mücadeleyi anma, emeğin değerine vurgu yapma ve işçi haklarının önemini vurgulama amacı taşıyordu.